Git workflow
Terminal
When working locally, you likely use the terminal to interact with Git. On CodeSandbox, Git commands will work as expected with two exceptions, changing and renaming the branch.
Each branch runs on its own virtual machine (VM). So instead of checking out a branch within the same VM, when you change a branch on CodeSandbox, we will navigate you to the branch running on its respective VM.
However, if you currently use git checkout to update your branch from target, you will need to conform to the following:
- If you use
checkoutwithrebaseyou should use the following command instead:git rebase origin/main my-current-branch. This is a more efficient way (opens in a new tab) and bypasses the need for a checkout - If you use
mergeyou should use the upper left pill in the UI which appears automatically when you are behind your target
If you need to rename the branch, please double click the name in the topbar and change it there.
Git panel
After you have made some changes to your code and saved them (⌘ + S or Ctrl + S), you will notice a purple notification next to the git icon at the top of the left sidebar.
Clicking that icon or using ⌃ ⇧ G or Ctrl + ⇧ + G reveals the Git panel, which will contain a list of your previous commits, as well as all uncommitted changes.
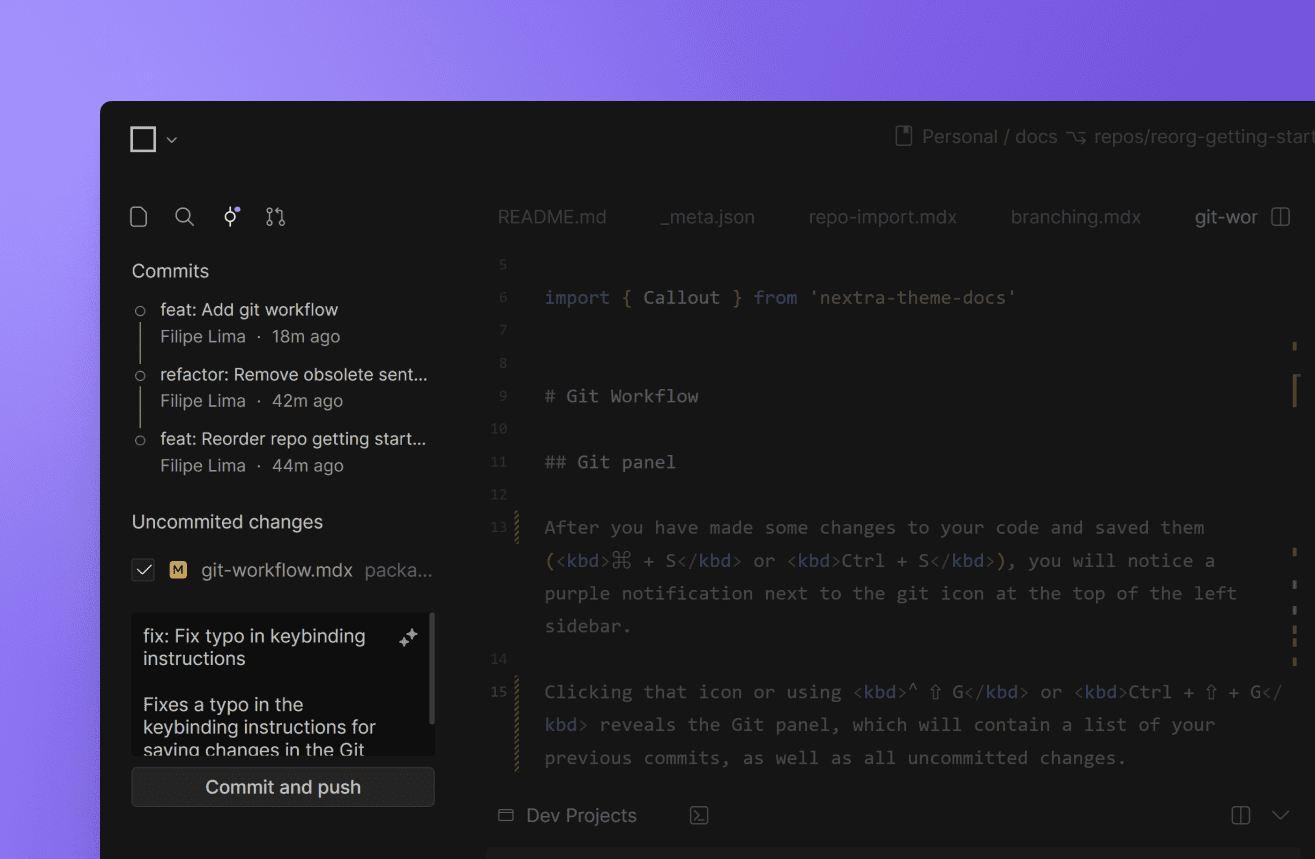
Committing changes
Under the "Uncommitted changes" section, you will find a text field where you can input a commit message. If you have the Boxy AI assistant enabled, Boxy will automatically suggest a commit message based on the changes you made. Optionally, you can click the sparkles icon at the top right of the text box to generate a new commit message using Boxy.
Finally, when you click the "Commit and push" button, we commit the changes to the branch on GitHub.
Opening a pull request
After you have committed some changes, you can open the "Pull request" tab at the top of the left sidebar (or using ⌃ ⇧ I or Ctrl + ⇧ + I), which will display a list of all the files that have been changed.
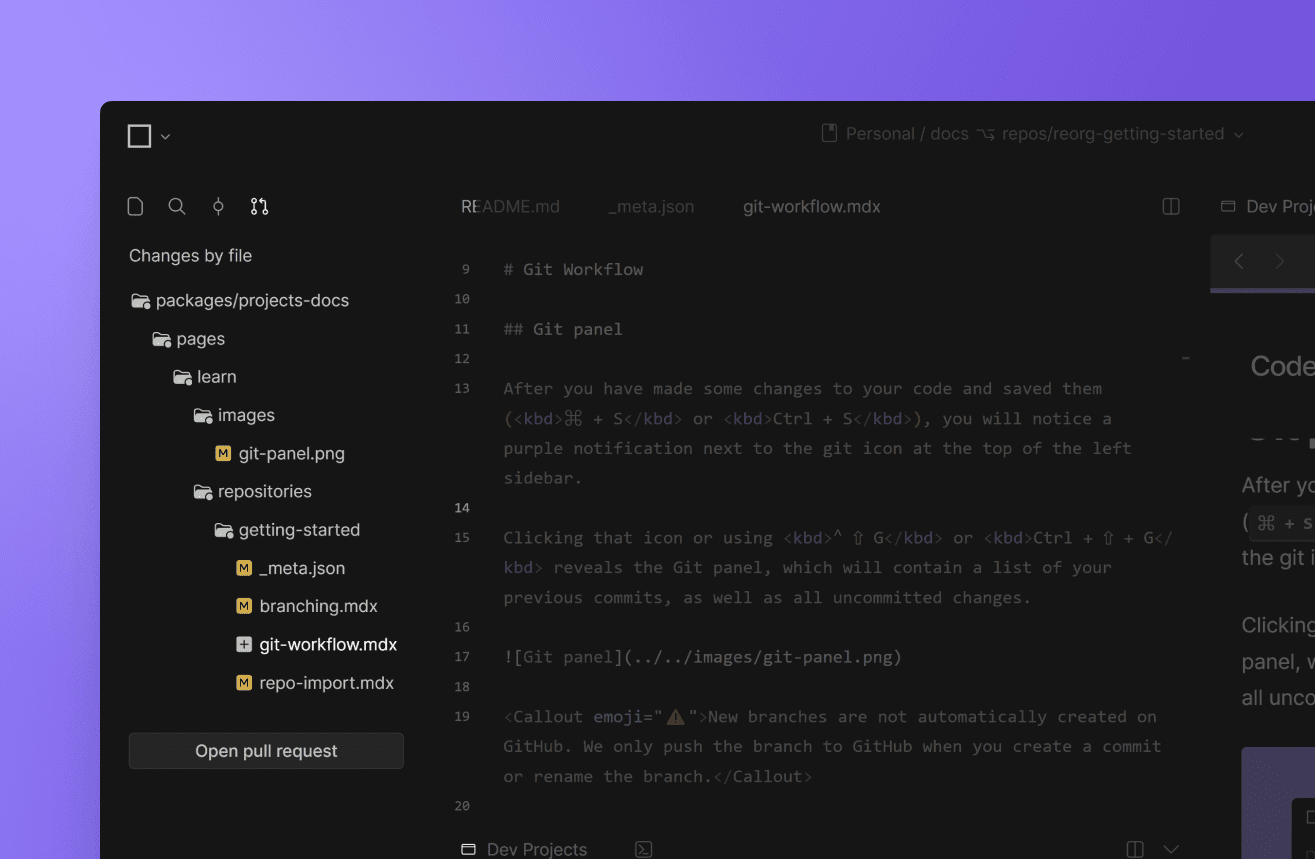
When you're ready to open a PR, you can either click the "Open pull request" button at the bottom of the "Pull request" tab or click “Create PR” at the top right of the web editor.
Then, you will be redirected to GitHub, where you will be able to add the final details of the PR.
Reviewing a PR
CodeSandbox has a unique set of features that improve the PR review process.
Setting this up requires some additional one-time configuration, so see more details about this setup and workflow on the code reviews page.